Using Tags as a Trigger Condition
September 26, 2024In this feature, you can create or edit triggers based on specific tags. This enables automatic actions such as sending emails, text messages, or initiating action plans when certain tag conditions are met.
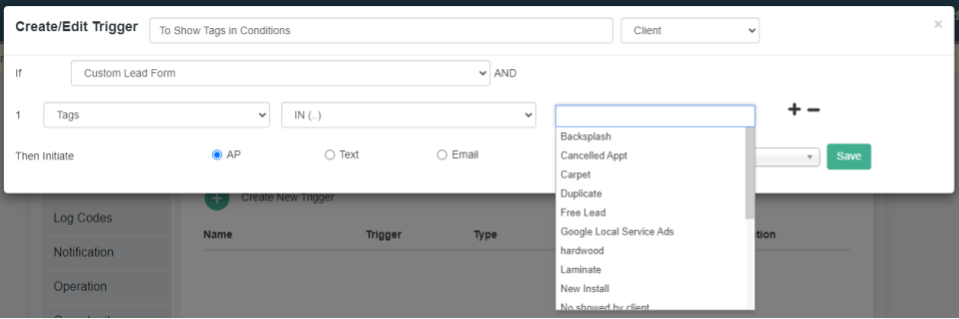
Creating a Tag-Based Trigger
- Trigger Conditions (IF Section)
- The If condition defines when the trigger should fire.
- In the example provided:
- Custom Lead Form is the primary condition.
- You can add additional conditions by clicking the + button or remove conditions using the – button.
- Using Tags in the Trigger
- In the Tags dropdown, you can select one or more tags to serve as conditions for the trigger.
- You can define whether the tags should be IN or NOT IN a contact’s profile using the operator dropdown.
- The tags in the dropdown list represent different types of tags that have been applied to contacts. In this example, tags like Backsplash, Carpet, and Google Local Service Ads can be selected.
Trigger Action (Then Section)
- Then Initiate:
- After the trigger conditions are met, you can choose one of the following actions to initiate:
- AP (Action Plan): Automatically assign a contact to an action plan.
- Text: Send a text message.
- Email: Send an email to the contact.
- After the trigger conditions are met, you can choose one of the following actions to initiate:
Additional Options
- You can add multiple conditions using the + button to create more complex logic.
- If necessary, you can also remove conditions by clicking the – button next to a condition.
This functionality allows you to automate workflows by setting triggers based on specific tags, streamlining how your team interacts with contacts based on their attributes.