Contact Relationships (linking)
July 16, 2024ClientTether: Contact Relationships or Linking: Users can effortlessly connect various contacts to other contact, creating a unified and comprehensive view of relationships and networks within their CRM. This enhancement simplifies managing and visualizing intricate connections, ensuring that all relevant information is at your fingertips.
How to Access and Use the Linked Contacts Feature in ClientTether
The Linked Contacts feature in ClientTether allows users to create and manage custom relationships between various contacts. This guide will walk you through accessing and utilizing this feature effectively.
Accessing the Linked Contacts Feature
- Navigate to any Contact List:
- There are many contact lists in ClientTether from the Dashboard, Pipeline or the Contact List from “Contacts” tab at the top menu.
- Open a Contact’s Profile:
- Click on the name of the contact you wish to link with another contact. This action will open the Contact Profile, displaying various tabs such as Contact Info, Whiteboard, History Notes, Text, Email, Event, and more.
Using the Linked Contacts Feature
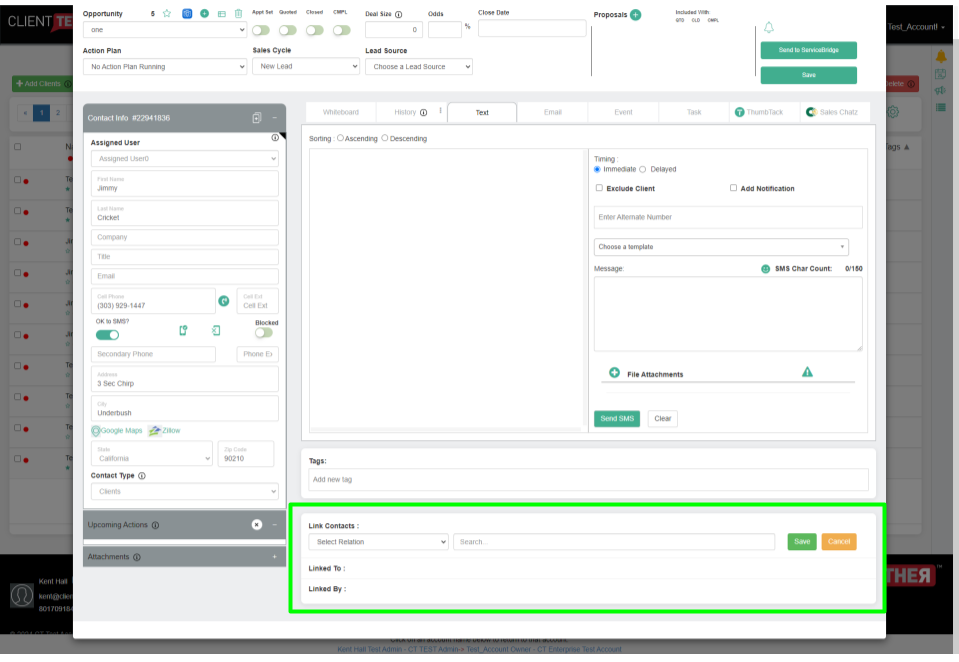
- Locate the Linked Contacts Section:
- Scroll down within the Contact Profile to find the “Link Contacts” section at the bottom of the page.
- Create a Custom Relationship:
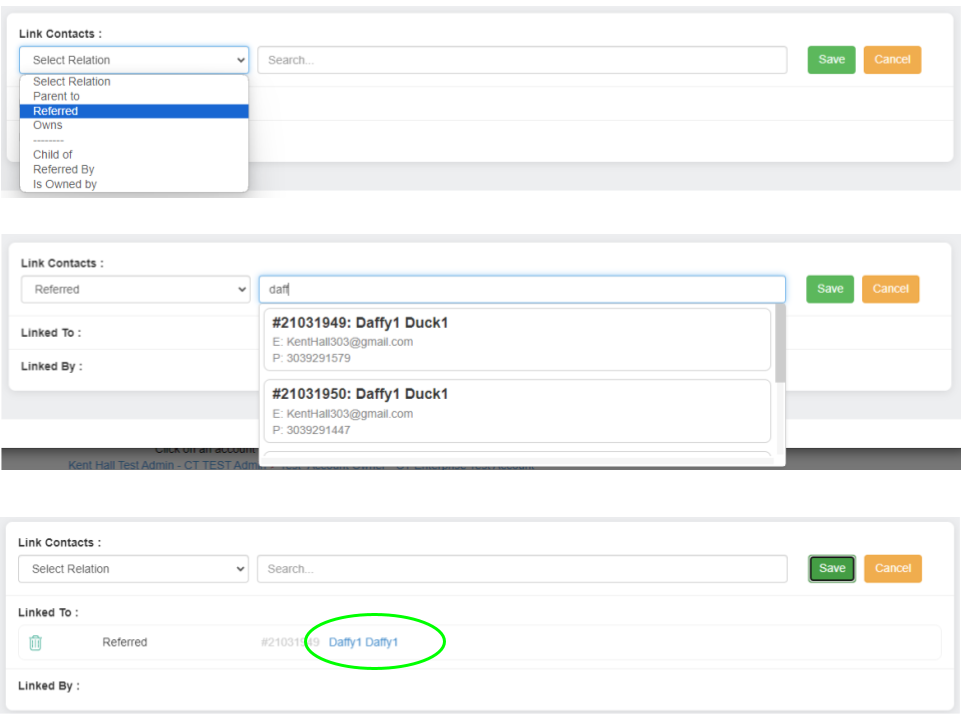
- In the “Link Contacts” section, click on the “Select Relation” dropdown menu to see the available relationship types (e.g., Parent to, Referred, Owns, Child of, Referred By, Is Owned by).
- Search for a Contact to Link:
- In the search bar next to the relationship dropdown, start typing the name of the contact you wish to link. The type-ahead feature will display matching contacts for quick selection.
- Select and Save the Linked Contact:
- Once you find the desired contact, click on their name to select them.
- Click the “Save” button to establish the relationship. The linked contact will now appear in the “Linked To” or “Linked By” field, depending on the type of relationship created.
Managing Linked Contacts
- To follow the linked contact, click on the Contact’s name to open its Profile.
- To delete a linked contact, click the trash icon next to the linked contact entry.
By following these steps, you can effectively utilize the Linked Contacts feature in ClientTether to create, manage, and visualize the relationships within your contact network, enhancing your overall CRM experience.
Creating Custom Linked Types in ClientTether

The Linked Types feature in ClientTether allows users to create custom relationships between contacts, tailoring the CRM to match their unique business needs. Follow these steps to create and manage custom linked types.
Accessing the Linked Types Feature
- Navigate to Settings:
- From the ClientTether main menu, mouse over the Hello item in the top right, then click on “Settings”.
- Open Contact Profile Settings:
- In the Settings menu, select “Contact Profile.” This will open the Contact Profile Settings page.
- Go to Linked Types:
- Click on the “Linked Types” tab within the Contact Profile Settings page.
Creating a Custom Linked Type
- Enter Parent and Child Labels:
- In the Linked Types section, you will see two input fields labeled “Parent Label” and “Child Label.”
- Enter the desired relationship type in the “Parent Label” field (e.g., “Parent to”).
- Enter the corresponding relationship type in the “Child Label” field (e.g., “Child of”).
- Save the Custom Relationship:
- Once you have entered the parent and child labels, click the green “Save” button to create the custom linked type.
- If you need to cancel the operation, click the orange “Cancel” button.
Managing Existing Linked Types
- View Custom Linked Types:
- After saving, the custom linked types will appear in a list format below the input fields. Each entry will display the parent and child labels along with options to edit or delete the relationship.
- Edit a Linked Type:
- To edit an existing linked type, click the pencil icon next to the relationship entry. Update the labels as needed and save the changes.
- Delete a Linked Type:
- To delete a linked type, click the trash icon next to the relationship entry. Confirm the deletion if prompted.
By following these steps, you can effectively create and manage custom linked types in ClientTether, enhancing your contact management capabilities and tailoring the CRM to your specific business requirements.