ClientTether Password Policy
July 18, 2024Overview
To ensure the security of our system and protect user data, ClientTether has implemented a comprehensive password policy. This policy outlines the requirements and procedures for creating and managing user passwords.
Password Policy Requirements
- First Login Password Reset
- New accounts and users must reset their password upon their first login.
- Automatic Logout
- Users will be automatically logged out after 30 minutes of inactivity to enhance security.
- Password Expiration
- Passwords must be reset every 180 days or less. This is enforced as an enterprise setting.
- Strong Password Requirements
- Passwords must meet the following criteria to be considered strong:
- Contain at least one uppercase and one lowercase letter.
- Include at least one number.
- Include at least one special character (e.g., !, @, #, $).
- Be at least 8 characters long.
- Passwords must meet the following criteria to be considered strong:
- Password Reuse
- Users cannot reuse the same password for at least 5 password cycles.
- Login Attempts and Captcha Verification
- After 5 failed login attempts, users will be required to complete a captcha verification on their next login attempt.
Implementation
New User Password Setup
When a new user account is created, the user will receive a temporary password. Upon their first login, they will be prompted to change this temporary password to one that meets the above strong password requirements.
Automatic Logout Procedure
The system will monitor user activity. If no activity is detected for 30 minutes, the user will be automatically logged out. Users will need to log in again to continue using the system.
Password Expiration and Reset
Users will receive notifications 15 days before their password is set to expire. They must reset their password by the expiration date. If the password is not reset, users will be prompted to reset it upon their next login attempt.
Managing Login Attempts
The system tracks login attempts. After 5 consecutive failed login attempts, the user will be required to complete a captcha verification to ensure they are not a bot. This measure helps to prevent unauthorized access.
Best Practices
- Users are encouraged to use unique passwords for different accounts.
- Avoid using easily guessable information, such as birthdates or common words.
- Regularly update passwords and avoid sharing them with others.
By adhering to these guidelines, users can help maintain the security and integrity of ClientTether’s systems.
For any questions or assistance with password-related issues, please contact our support team.
How to Fix: Cannot Make or Receive Calls
June 24, 2024Issue
When experiencing issues with making or receiving calls, the error might be related to the carrier blocking the call due to the calling number (caller ID). One common error code associated with this issue is:
Error Code: 32017
Error Description: Carrier blocked call due to calling number (caller ID).
Steps to Verify the Error on Twilio
To verify if the error you’re encountering is this specific one, follow these detailed steps to access the call logs on Twilio:
1- Log In to Twilio
- Open your web browser and navigate to Twilio.
- Log in with your Twilio account credentials.
2- Navigate to the Subaccounts
- Once logged in, click on Accounts from the main dashboard.
- Then, click on Subaccounts to view the list of subaccounts associated with your main account.
3- Filter by Account SID
- Locate the SID of the account experiencing the issue.
- Enter the SID in the search/filter field and click on the Filter button.

4- Access the Specific Account
- Click on the account that appears from the filter results.
5- Navigate to Monitor Section
- In the left-hand sidebar, you will see different tabs such as Develop and Monitor.
- Click on the Monitor tab.
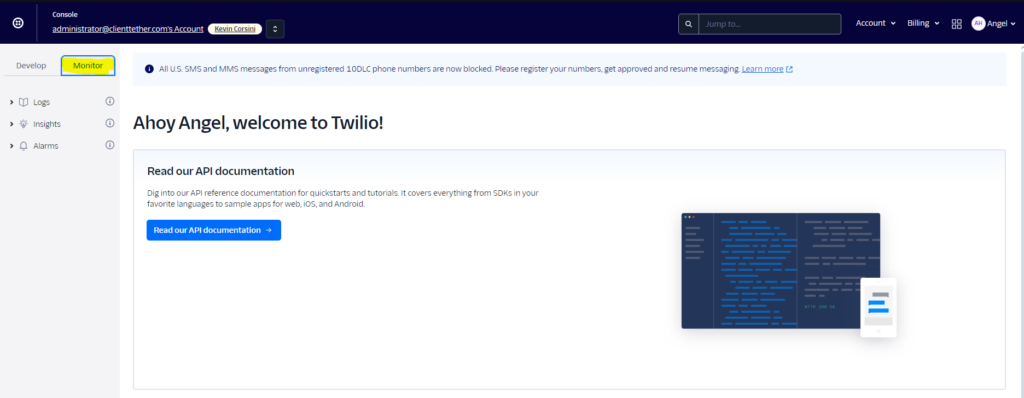
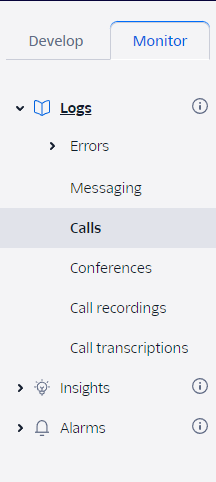
6- Select Logs
- Under the Monitor tab, you will see three options: Logs, Insights, and Alarms.
- Expand the Logs menu.
7- View Call Logs
- Click on Calls to view all call logs.
- Here, you will see records of all calls, including both successful and failed ones.

8- Identify the Failed Call
- Find a failed call or the specific call you want to inspect.
- Click on the call record to view detailed information.
9- Check Error Details
- On the call detail page, you will see the error code and description if the call failed.
- Look for the error code 32017 which indicates that the carrier blocked the call due to the calling number (caller ID).

By following these steps, you can accurately identify if the issue you’re experiencing is due to the carrier blocking the call. This documentation will help you and your colleagues troubleshoot and address the problem efficiently.
Accounts List Page
January 8, 2021Overview
The Accounts page is available to any Multi-Level Account. Meaning you have, or are set up to add sub-accounts.
On this page you get a list of all of your sub-accounts and their sub accounts.
You can see the acccounts’:
- Company name
- Account Admin
- Account Admin Last Login
- Created Date
- Subscription Plan
You can also:
- Login to the sub accounts by clicking

- Perform various actions by clicking the arrow on

- This will be covered in depth below
- See the full contact list for an account by clicking the
 that is next to the Company Name.
 - Search for a contact in all of the sub-accounts by using
 in top the right corner of the page.
 - You can select what you are searching for via the drop down menu between Search bar and search button.
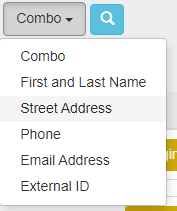
- Please note that if you select combo it will search all options with your data.
- That means if you are searching for phone number with 555-555-5555 it will pull up addresses, email addresses, etc., that have 555 in them.
- It is best practice to select the specific category you are searching in.
- Also be aware that the phone option can now accept any 10 digit formatting without it causing a problem for searches
- 5555555555
- (555) 555-5555
- 555-555-5555
- 555.555.5555
- etc.
- Please note that if you select combo it will search all options with your data.
- You can select what you are searching for via the drop down menu between Search bar and search button.
To create a new account or clone an account you have to go to the Account Settings page.
Topics
![]() to the far right gives you many options of what you can do on this page.
to the far right gives you many options of what you can do on this page.
Also visit Account Types to learn more about different types of Accounts in ClientTether.
Edit Account
The Edit Account Action allows you to update the following account information:
- First Name
- Last Name
- Company Name
- Account Name
- Phone
- Office-Phone
- Website
- Address information
Change Password
The Change Password action allows you to update your account’s password.
This window will show the username.
- Type in new password in New Password field
- Re-type in new password in the Confirm Password field.
- Click

- You will see a confirmation message that the password has been updated.
- To close the window click
 or click outside of the window.
Upgrade to Multi-Account
This allows you to change your sub accounts from a single level account to a multilevel account.
To do this just select to Upgrade Multi-Account.
If this upgrade is in place and you want to change the account back to a single level account. The “Upgrade to Multi-Account” option will be replaced with “Mark as Single Level” and this will change will the account back to single level account.
Move Account
The Move Account action allows you to re-arrange your accounts.
When you click on this option it will open a window with a drop list of your accounts and you can move the account under the account you wish.
Delete Account
The Delete action will completely remove an account.
Just click ![]() and this will remove the account.
and this will remove the account.
If you delete an account this will completely remove it, and all contacts and content within it from the system. You cannot undo this.