ClientTether Mobile App
August 30, 2023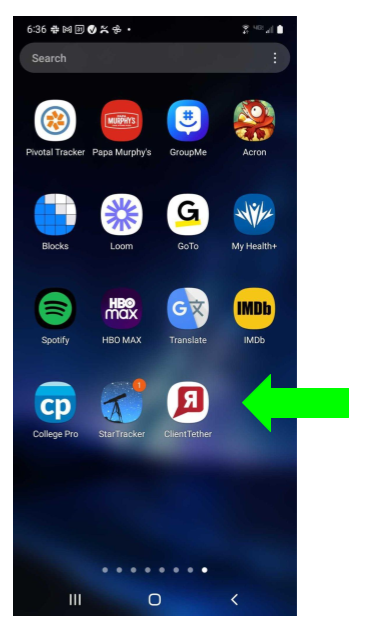
The ClientTether Mobile App is designed for Users in the field, with a focus on Contacts, Proposals and Notifications. All Settings and Design modes are reserved for the desktop version.
You must already have an account with ClientTether to take advantage of this app as the same Username and Password are used for accessing both the Mobile and Desktop versions.
The App is free to use for account holders to extend your access to the ClientTether CRM.
The v1 App does NOT support Dark Mode.
Get the ClientTerther App from the Google Play Store. After Installing, you will find an App icon like this one.
This is an App, please do not expect it to have all the power of the desktop version. This App is focused on Contacts, Proposals and Notifications.
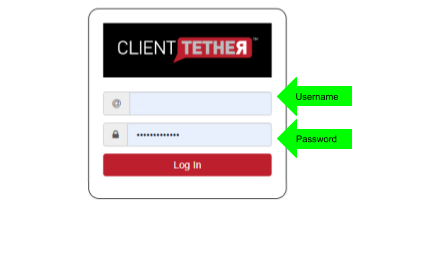
The Login screen is the same form as found on the desktop version.
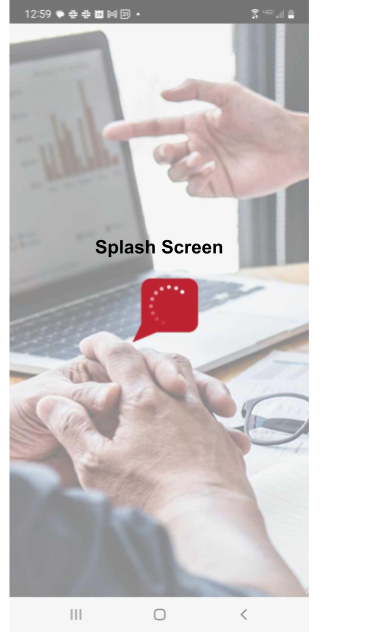
Whenever the App is loading data, you might see this splash screen.
Contact List
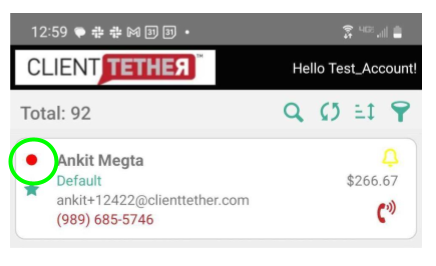
The Contact List is the default landing page in the ClientTether Mobile app. Each Contact is shown as its own card with some of the same visual details as shown on the desktop. Contacts are loaded ten (10) at a time. When you scroll to the bottom of the first set of ten name swipe up again to load the next ten Contacts.
Dots in the top left corner
Red: indicates this contact is in the New Lead Sales Cycle.
Yellow: indicates there was a contact reminder that has been missed. This color will over-ride red.
Green: indicated there is a contact reminder for today. This color will over-ride both yellow and red.
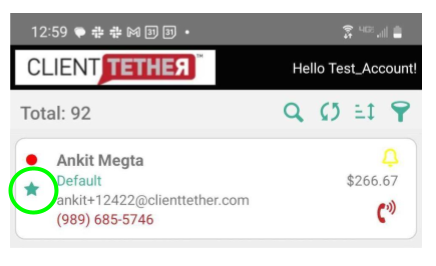
Stars in the left margin
Filled Stars: indicates this contact is a main contact.
Unfilled Stars: indicates this contact is attached to some other main contact.
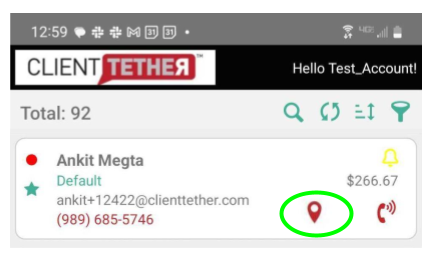
Map Pin Icon
If the contact has an address that can be mapped, an interactive Map Pin will appear with the Contact Card. You can click on that icon to view the address on a Google Map.
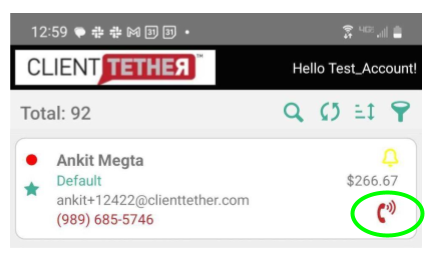
Phone Icon
The phone icon is interactive and will initiate the same Click-to-Call process as the desktop application where the system will call the User and ask for confirmation to call.
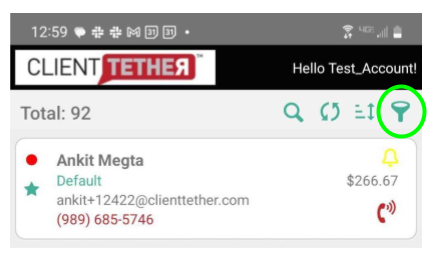
Filter
The system shows there are 92 leads in this account. Even though your full contact list might have many lead, the system will only load 10 contacts at a time. Use the Filter to narrow down the list to the Contacts you really want to work with.
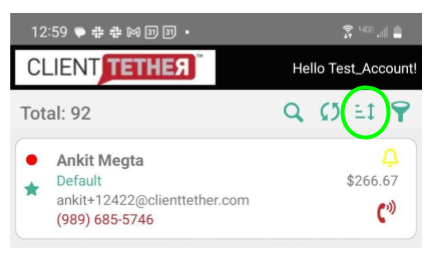
Sort
When working with a list of Contacts you might need to sort them. Use the Sort Icon to select from several sorting options.
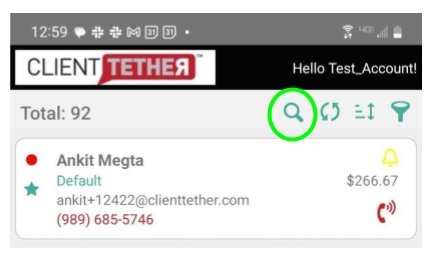
Search
Any long list can be narrowed down by a simple Search. Click on the search Icon to open the Search input field.
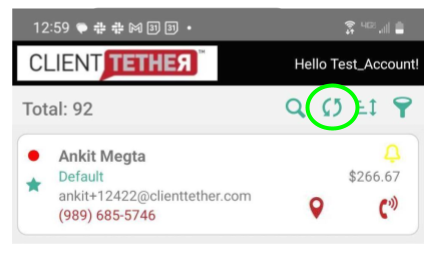
Reset
Use the Reset Icon to remove any previously set Filter, Sort or Search
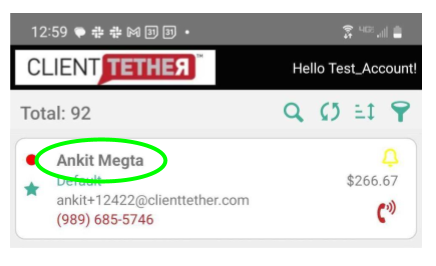
Contacts Name
Similar to the full application, the Contact’s Name is interactive and will open the Contact Profile.
Contact Profile
The Contact Profile is the main hub to interact with the Contact’s information. This will open as a popup above your Contact Profile. Thus you will have to click on the X in the top right to Close this popup when you are finished. The most often actions take in Contact Prorils are: Whiteboard, Text, Email and Events
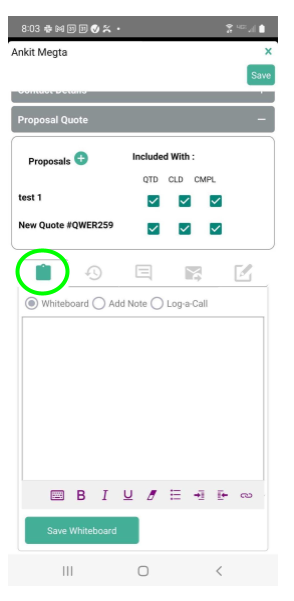
Whiteboard
The Whiteboard allows you to enter shareable quick notes about the contact acquired via conversation or observation. These notes are shared with other User in your account.
NOTICE: After typing Whiteboard Notes, you must click the “Save Whiteboard” button.
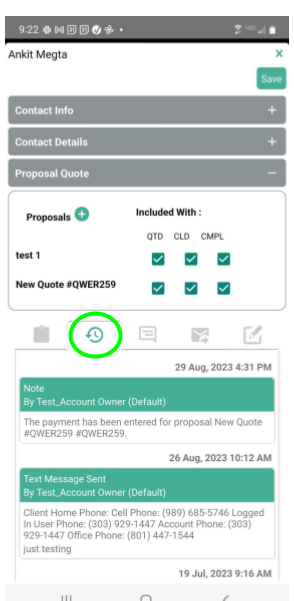
History Notes
The system auto-logs most everything you do as History Notes. For example, if you sent a text or email, the system will put a date and time stamped copy in History Notes. This save you time by not having to write a History Note that you sent an email.
The History Notes section is where you can review the of communication and automation that has occurred with each Contact.
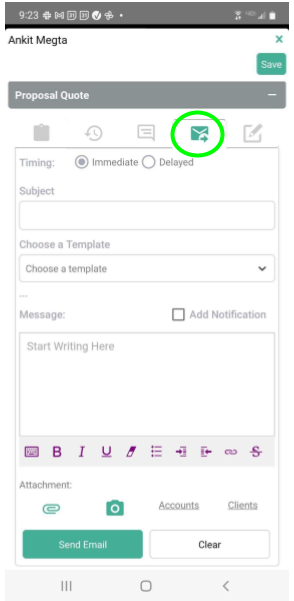
Text
ClientTether allows you to send text messages through the system thereby sending the message from the ClientTether number instead of your personal mobile number. Returned text messages will be shared with you in this same location for each Contact.

Email
The mobile app allows you to send emails to contacts using the email setting entered in the desktop application Settings. You will either let our email server send them or enter your own SMTP settings.
Events
There are three types of events that can be set in ClientTether: Automated Call, Contact Reminder and Next Appointment.
User the Event Type dropdown to choose which of the three you would like to set. With that selection made fill out the rest of the custom form to create the event.

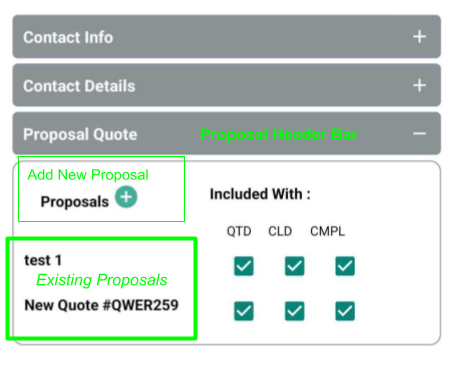
Proposals
Proposals are the next most common activity in the field with the App. Click on the Proposal expansion bar in the Contact Profile to open this section. Again this is an App, please do not expect it to have everything the desktop version has.
Create or Open a Proposal
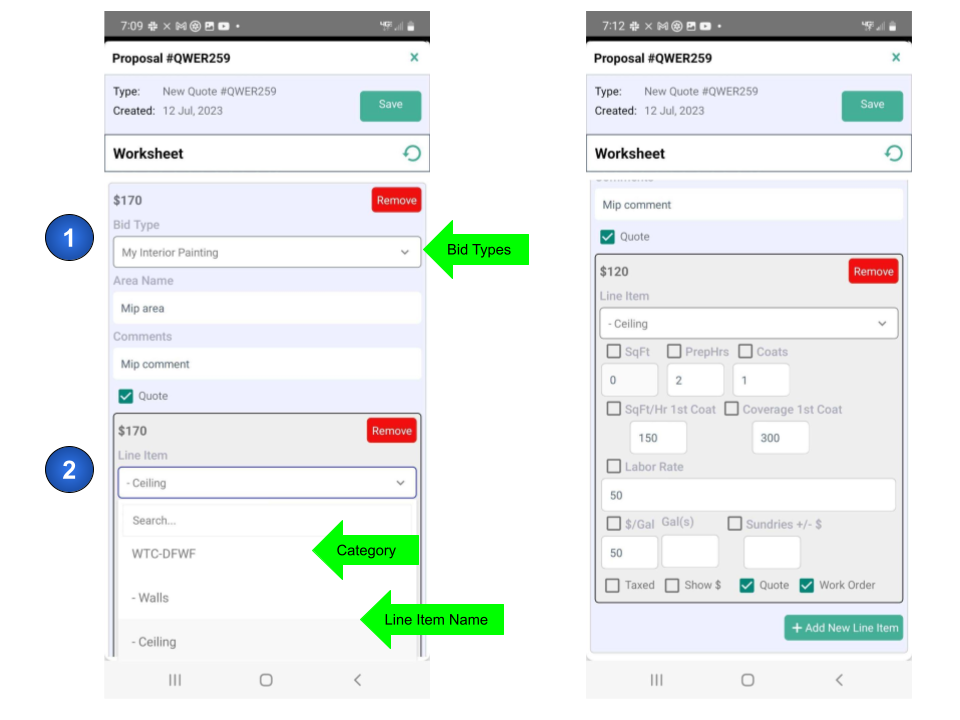
In the Contact Profile there is a proposal section, which will show Existing Proposals and allow you to Add (create) a new one. When you have opened a Proposal it will show the Worksheet.
A proposal’s organization is built around Bid Types, Categories, and Line Items. Choose the dropdown at position 1 to select a Bid Type.
Choose the dropdown at position 2 to scroll through the combined menu list of Categories and Line Items. In the example below, Category WTC-DFWF includes Line Items: Walls, Trim and Ceiling.
After selecting the Line Item – Ceiling, the rest of the input fields will be displayed according to the design. Repeat the process of adding Line Items to complete the Proposal
Calendar
Calendar is an option at the bottom of the mobile app. This will open a Month calendar. YOu can click on any day in the month to show an agenda view for the day. Click on any Agenda item to see the details.
Notifications
Notifications is a big part of this app and is found in the bottom right of the screen. All notifications that the User has set up see will be shown here. Notifications tell you what is going on with your Contacts.
After viewing or handling a Notification, you can swipe right to begin the archive process. You will have to then click on the Red Archive button that appears.