Proposal Field Types
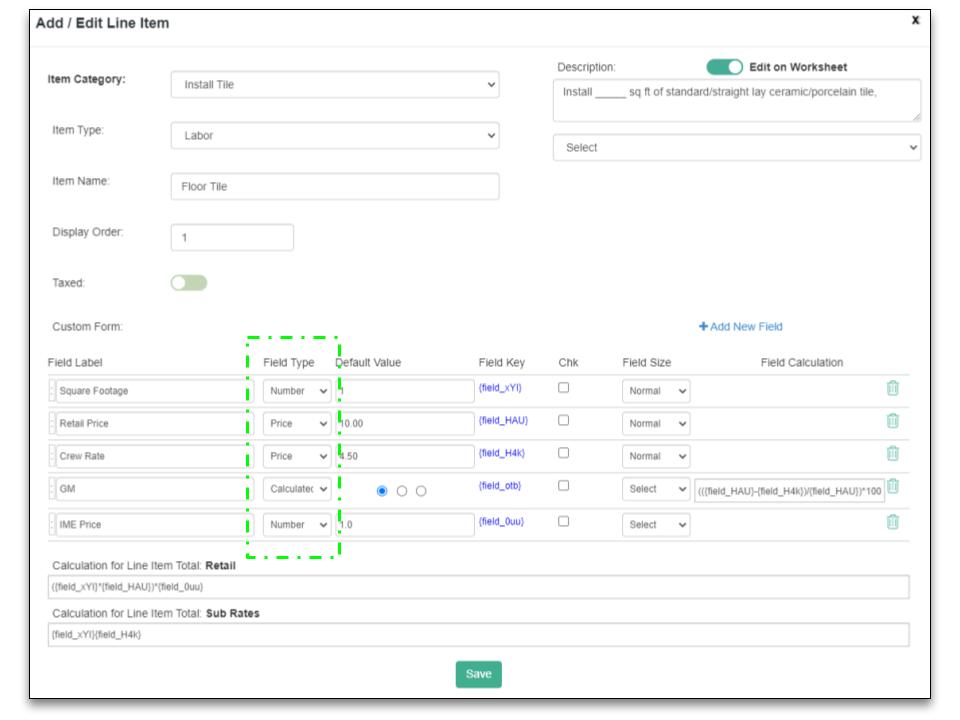
April 18, 2023When you build a proposal in ClientTether, you will be using our proposal’s custom form editor to build each Line Item. Each field in the Line Item will declare its field type, giving unique properties to each.
This slide deck will introduce you to the Field Type options.
Hosted Pages: New Meeting Scheduler
March 30, 2023The New Meeting Scheduler replaces the previously released Online Scheduler, which will be removed once we get all Users converted.
There are three main steps to using Hosted Pages.
– Set-up the Hosted Page: New Meeting Scheduler
– Assign the Hosted Page Token to a Template
– Send the message to a Contact
In the video above, step 1 and 3 are described. Step 2 is covered in a video regarding Templates.
Simplify Your Scheduling Process with New Meeting Scheduler
We are excited to announce the latest addition to our platform that will simplify your scheduling needs. With the New Meeting Scheduler in ClientTether, managing your schedule and appointments is easier than ever before. Here are the advantages that come with our New Meeting Scheduler:
Effortless Booking Experience: With our New Meeting Scheduler, your clients can quickly and easily book appointments without the need for back-and-forth emails or phone calls. The form prefills with contact information, which reduces data entry and provides a more professional experience.
One Scheduler form for New Leads and Existing Contacts: Our New Meeting Scheduler can be used for both new leads and existing contacts, which makes it convenient to manage all of your appointments in one place.
Access to Event and Action Plans: The New Meeting Scheduler gives you direct access to Event and Action Plans, so you can communicate with your clients more effectively.
Customizable Scheduling Page: You can customize your scheduling page to reflect your brand and business. It uses your ClientTether header settings, allows you to change the icon colors, and personalize the messaging. This makes the scheduling process more professional and consistent with your brand.
Automated Reminders: New Meeting Scheduler attaches Event Plans and Action Plans to send automated reminders to your clients regarding their appointment. This reduces the likelihood of missed appointments and saves you time and effort. With Event and Action Plan, you can set reminders to be sent a day, hour, or even minutes before the appointment.
Calendar Integration: The New Meeting Scheduler checks with your ClientTether Calendar, which in turn can sync with Google and Outlook Calendars. This means that when a client books an appointment with you, it will automatically appear on your calendar on whatever device you use. This eliminates the need for manual data entry and reduces the risk of double-bookings.
Real-Time Availability: Your clients can see your real-time availability when booking an appointment. This means that they can choose a time that works for them without the need for back-and-forth communication.
With the New Meeting Scheduler in ClientTether, you can save time, reduce confusion, and provide your clients with a seamless booking experience. Plus, with our customizable scheduling page, you can ensure that your brand is consistent throughout the entire customer journey.
In conclusion, our New Meeting Scheduler feature is a game-changer for businesses looking to streamline their scheduling process. Try our scheduling feature today and see the difference it can make for your business.
ClientTether Meeting Scheduler Feature Documentation
Overview
ClientTether’s meeting scheduler is designed to optimize your daily schedule by grouping appointments within a reasonable drive time. This ensures that your appointments are efficiently managed, minimizing travel time and maximizing productivity.
Setting Up the Meeting Scheduler
- Accessing the Meeting Scheduler
- Navigate to the “Hosted Page -> Add/Edit ” section in your ClientTether Settings.
- You can either create a new meeting schedule or edit an existing one.
- Meeting Details
- Meeting Name: Enter the name of the meeting.
- Description: Provide a brief description of the meeting.
- Appointment Length: Set the duration of the appointment.
- Wrap-up Time: Specify the time required to wrap up after the meeting and drive to the next.
- Advance Notice: Choose how much notice you need before the meeting.
- Users: Select the users involved in the meeting.
- Type: Choose the type of meeting location:
- At my office location – Enter Office Address
- At contact’s location – Enter Default Address (starting location)
- At phone-click to call
- Video conference – Enter Video Conference URL
- Notes Label: Add any specific notes related to the meeting.
- Appointment Theme Color: Select a theme color for the appointment.
- Appointment Font Color: Select a font color for the appointment.
- Optimizing the Schedule
- Drive Time Calculation: The scheduler computes the drive time between appointments to keep them grouped by geolocation. This helps in avoiding long travel times between meetings.
- Wrap-up/Drive Time: Set the wrap-up and drive time to ensure there is enough time between appointments for travel.
- Default Address: Specify your starting address for the day. The first appointment scheduled on a day sets the geolocation for that day, and all subsequent appointments will be arranged around this location.
- Configuring Days and Time Slots
- Expand the “Available Days/Time of Day” section to restrict the days and times offered for appointments.
- This ensures that potential site opportunities are only offered within your available time slots.
Example Scenario
Imagine you are managing a territory in the Denver Metro area, with appointments that could range from Fort Collins to Colorado Springs. The drive time from one end to the other can be over 2 hours. By using ClientTether’s schedule optimizer, you can ensure that your appointments are grouped by location, minimizing travel time and optimizing your schedule.
Basics to Remember
- The first appointment scheduled on a day sets the geolocation for that day.
- All subsequent appointments must work around the initial location.
- Control the drive time by setting the appropriate wrap-up/drive time and default address.
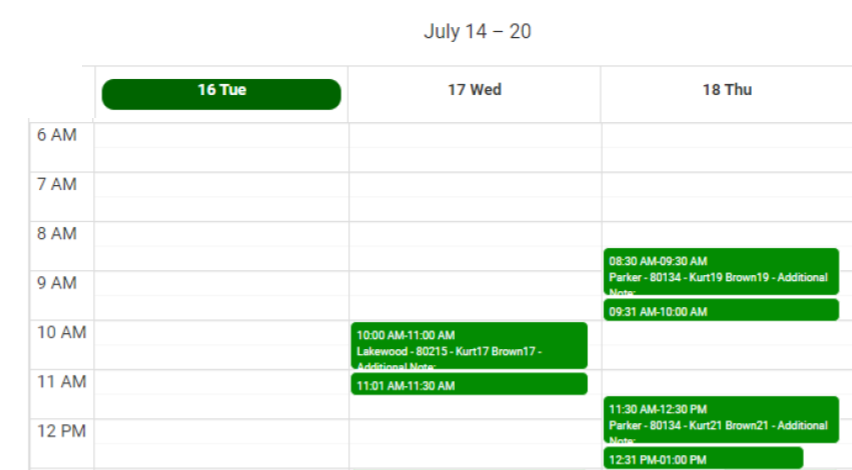
By following these steps, you can effectively set up and utilize ClientTether’s meeting scheduler to manage your appointments efficiently and minimize unnecessary travel time. Both the Main Appointment time and the Wrap-up/Drive Time will show on the calendar.
Multiple Proposals per Opportunity
March 29, 2023This was a customer driven feature. There are generally two scenarios where multiple proposals are useful. One scenario is when each proposal is unique and the other scenario is when a portion of a proposal is duplicated on another.
Because proposal data is used in charts, Users will need to pay attention to the checkboxes provided to control whether the proposal dollars are included or not at each milestone of the Opportunity

In the image above, the Blue section represents the Opportunity and the Green section shows the Proposals. The image below shines more light on the features of the Proposal area. Features that were once several clicks away are now at your fingertips: Add New Proposal, Open Proposal, Payments, Invoice, Proposal Signed.

Increase Email Open Rates with Video Content – Here’s How to Include Videos.
February 22, 2023Adding videos to emails can bring numerous benefits to your email Templates and Action Plans. Here are some of the key advantages:
- Increased engagement: Videos are a highly engaging form of content that can capture people’s attention and keep them interested for longer. When you include a video in your email, you provide your audience with an immersive experience that can help you stand out from the competition.
- Improved click-through rates: According to research by HubSpot, adding a video to your email can increase click-through rates by up to 300%. This is because videos are more compelling than static images or text, and they can encourage people to take action.
- Higher conversion rates: When people are engaged with your content, they are more likely to take the desired action, whether it’s making a purchase, filling out a form, or subscribing to your newsletter. According to Campaign Monitor, including a video in your email can increase conversion rates by up to 80%.
- Better retention: Videos can help you keep your audience’s attention for longer, which can be particularly useful if you are trying to explain complex concepts or showcase your products or services. By providing an engaging and informative video, you can improve the chances that your audience will remember your message and take action.
- Improved open rates: According to research by HubSpot, adding the word “video” to your email subject line can increase open rates by 19%. This is because people are curious about video content and are more likely to open emails that promise a video experience.
In summary, adding videos to your emails can be a powerful way to increase engagement, improve click-through rates and conversion rates, better retain your audience’s attention, and boost your open rates. With the right approach, videos can help you create a more compelling and effective email marketing campaign.
Building Tokens in URLs
February 20, 2023The expansion of Tokens has lead to an increase of Users asking about how to build Tokens into custom links or URLs inside of ClientTether. We hope the above video will help your understand this feature.
The first step is understanding what data the URL will accept in the form of Key:Value pairs. In our example the Survey Monkey form will accept three Key:Value pairs:
n:Name, dept:Department (or Company in our case) and t:Title
Next you need to know what tokens in ClientTether are going to provide you with the values you desire. In this example it is {{client.firstName}}, {{client.compName}} and {{client.job_title}}.
Then it is just a matter of putting them together to form the URL.
Hosted Page CT Sign: Edit when shared
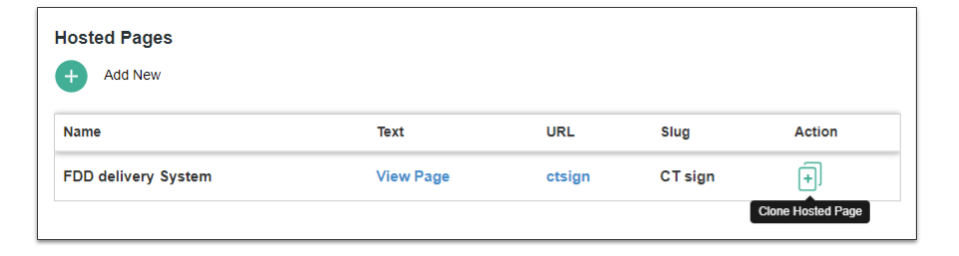
February 2, 2023A CT Sign Hosted Page can be shared with subaccounts. If the subaccounts wants to edit their own copy of the shared Hosted Page they must first Clone it to their own account. The original shared Hosted Page is owned and maintained by the Multi-Level account that originally shared it.
The Cloned Hosted Page is editable by the subaccount.
Proposals Tax District
February 2, 2023A Tax District can be created and assigned to a proposal based on the Account that the Contact is currently in. If the Contact is moved (see below) the system will evaluate the assigned Tax District and reassign it according to the Default Tax District in the receiving Account.
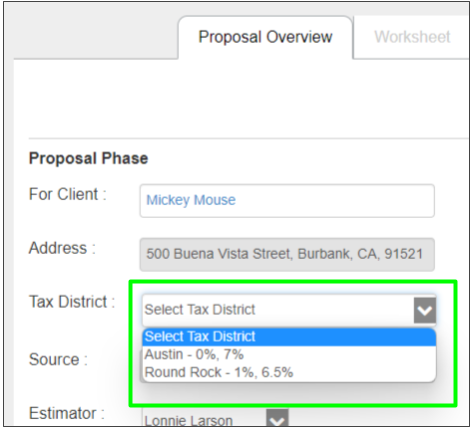
The Move processes that will evaluate the Tax district are:
1. Appointment Assign To
2. Manual Mass Move
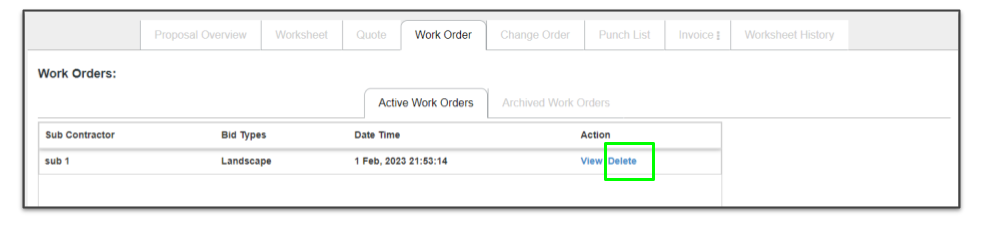
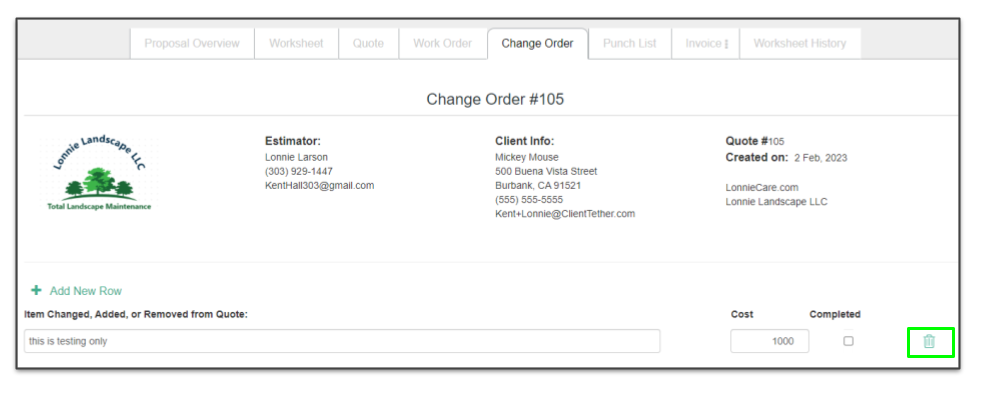
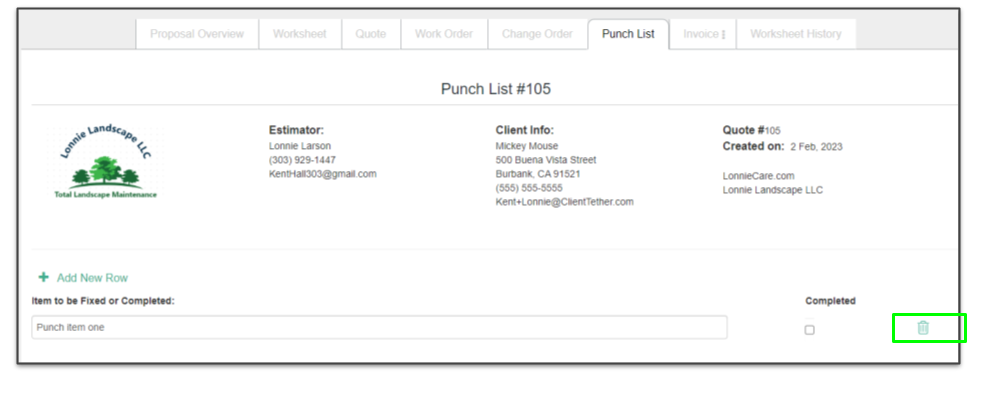
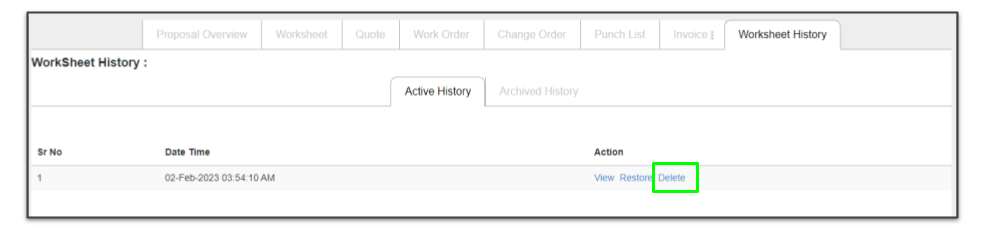
Proposal Additional Delete Options Added
February 2, 2023The following delete options have been added to Proposals.
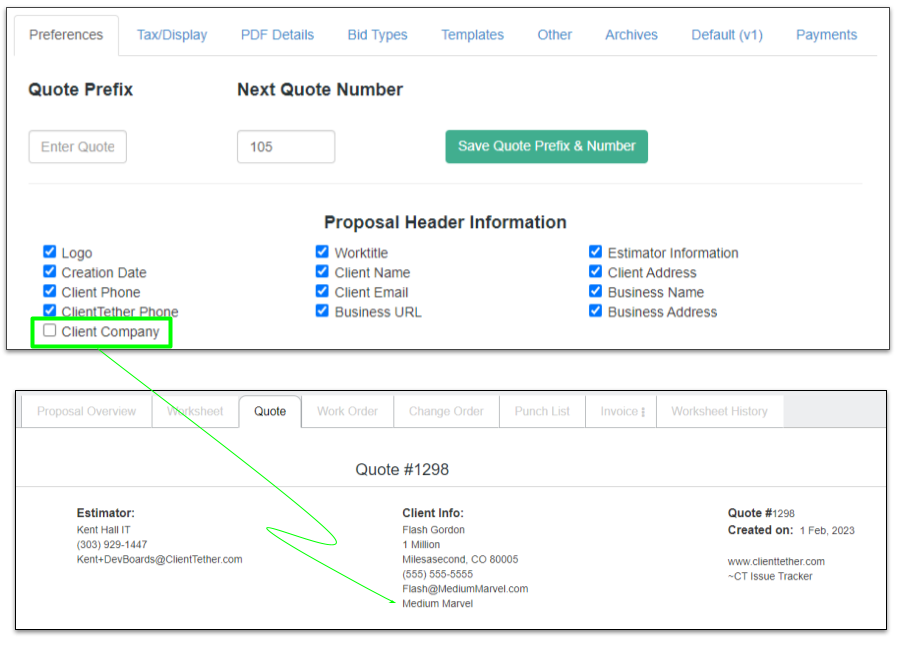
Proposals: Show Contact’s Company Name in Quote Header
February 2, 2023First the Client Company should be checked in Proposal Preferences.
Then it will show in the Quote Header
Contact List All: letters indicate Contact Type
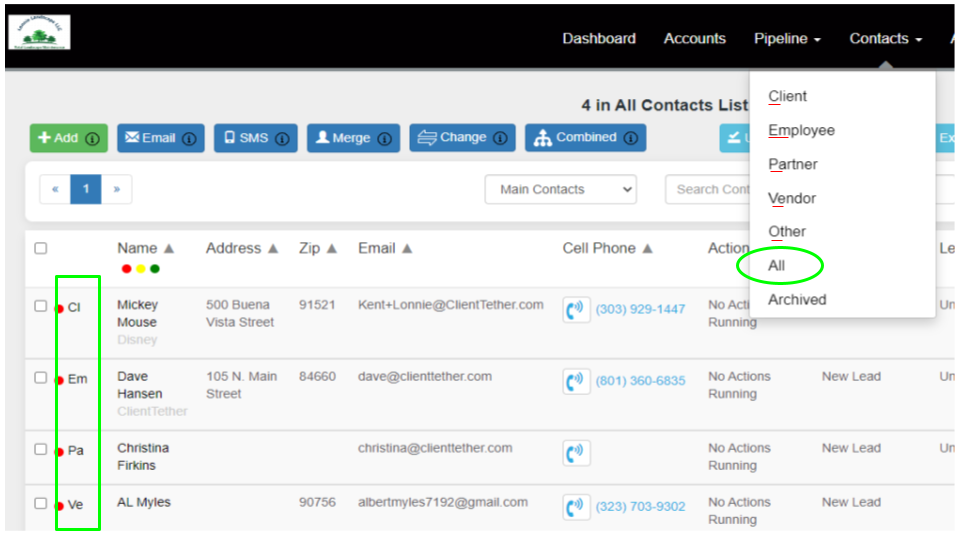
February 2, 2023When displaying Contact List “All”, the system will put a new column in the Contact List with the first two letters of the Contact Type to help you keep them separate.