Notifications
April 27, 2020Overview
Notifications alert the User to activity within the account and are shown in the upper right side panel of the account.
Notifications are specific to the User and are reflective of their activity within the account and activity related to contacts where they are the Assigned User. To determine which Notifications you wish to be alerted of as a User, please visit the Notifications tab in Settings and make those selections. Additional information is available within the User Manual at ‘Notification Settings.’
 This icon shows at the upper right panel of your account If Notifications have been generated for your review.
 This icon shows if there are no Notifications currently generated for your account.
To view the Notifications, click on the icon noted above to expand the Notification panel. Additional viewing settings for Notifications are outlines below.
Topics
Variations
Variations on how Notifications are shown in your account:
- No new or unattended notifications
- Unattended Notifications
- These are notifications that are not new but require some action on your part.
- New Notifications
- The number in the middle indicates how many new notifications you have.
Tools
Several tools are provided in the right side panel sidebar to assist you with viewing and sorting the Notifications within your account.
- The
 allows you to increase the Notifications Panel size.
 - The
 allows you to collapse the Notifications Panel
 - The
 allows you to sort Notifications based on their timestamp
 - The
 allows you to refresh your Notifications list
 - The
 allows you to select which type of Notification you wish to view–further detailed below.
 - The
 allows you to delete ALL Notifications in the panel–OR–click this icon to delete on that specific Notification.
The Ellipsis Menu offers the following options:
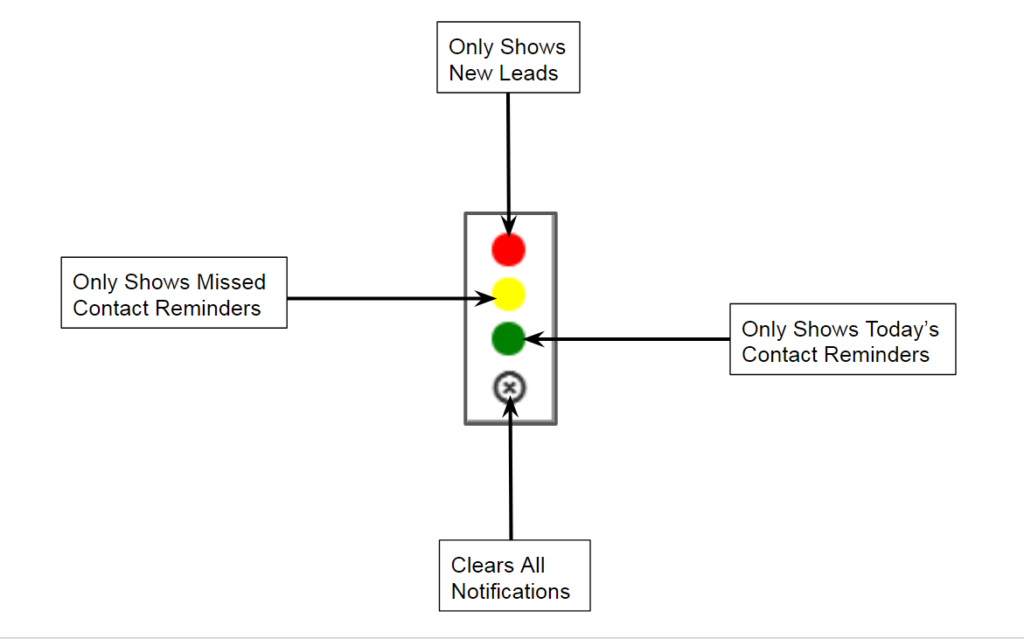
Notification Types:
Here is a basic list of the types of notifications you may see within your account.
- New Contact Created
- New Communications from Contacts received
- Call/Voicemail
- Text Message
- Actions Completed
- Contact Reminders
- System Notifications
Announcements
April 27, 2020Announcements will come in periodically about updates or new features in ClientTether.
Also if you are an account owner you can create announcements to keep your team and sub-accounts up to date on new developments within your organization
View Announcements
To view announcements there are two options
Create Announcements
To create announcements you need to:
- Go to the Announcement tab in Settings
- Click
 next to add announcement
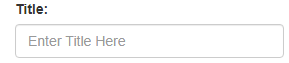
 - Enter the title for the announcement
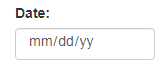
- Pick the date for the announcement
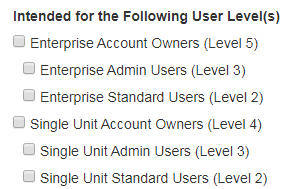
- Select who you want the announcement to go to
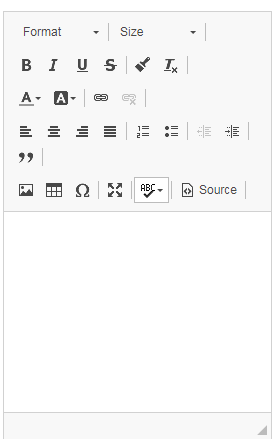
- Type up your announcement in the text editor
- Select Pending or Publish
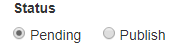
- Pending will save the announcement as a draft when you save
- If you put it in pending you will still need to publish it
- Publish will push the announcement to the those you wanted to receive it
- Active displayed in Right-Side Bar
- Inactive available in history
- Pending will save the announcement as a draft when you save
- Click

Editing existing Announcements
- Click on

- Make Desired Changes
Stats for Announcements
- Click on

- Use check box if you wish to see which users have not received your announcement
History Notes
April 15, 2020Overview
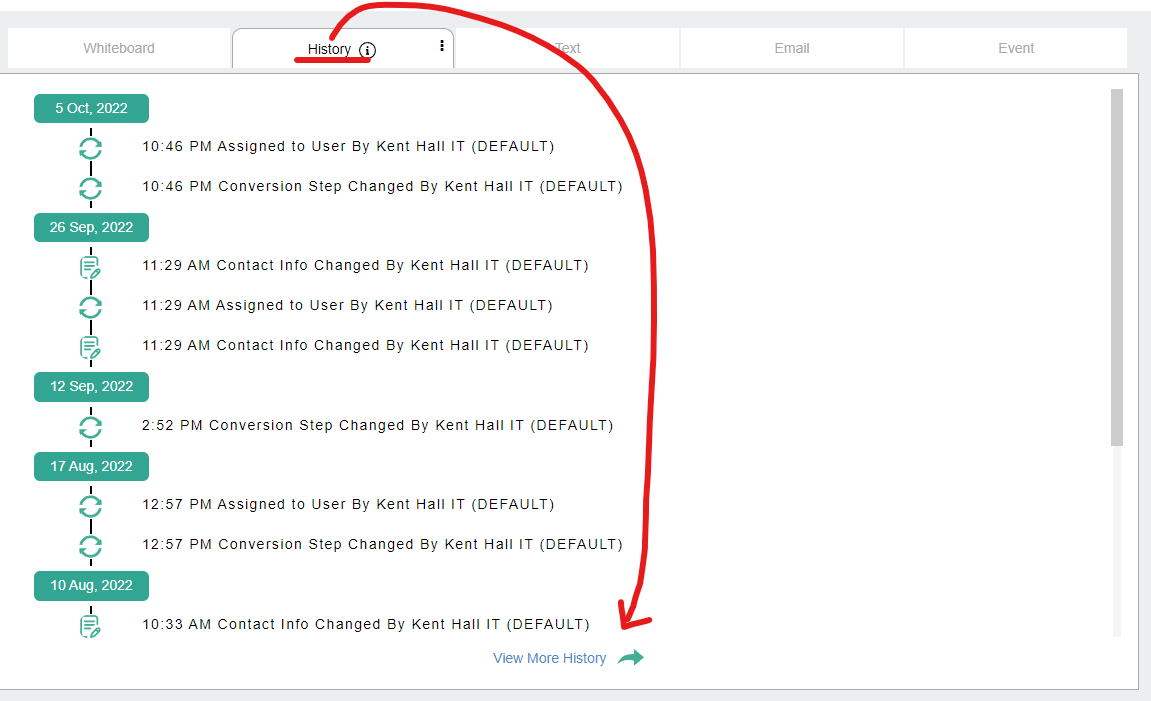
From within the Contact Profile, select the History tab to the right of Whiteboard to view a time-stamped history of activity for the specific Contact. Information here shows the last 100 records of activity for this Contact and that activity can be sorted ascending or descending by selecting that preference at the three dots to the right of the History tab title. History Notes provide an easily accessible, visible record of all activity, interactions and important information for a Contact. All phone calls, text messages, emails, and notes regarding a client are stored in the history tab in a Contact Profile.
The information in the History tab within the Contact Profile is limited to 100 notes/records. To view activity for this Contact that occurred beyond the 100 records shown, select the “View More History” link at the lower right of the activity list in History to launch a new browser tab that will provide a view of the complete History of all associated activity for this Contact.
Below, we will cover the following topics:
- Video Tour of History Notes
- How to Access History Notes
- What is Stored in History Notes
- How to Add History Notes
Video Tour of History Notes
How to Access History Notes
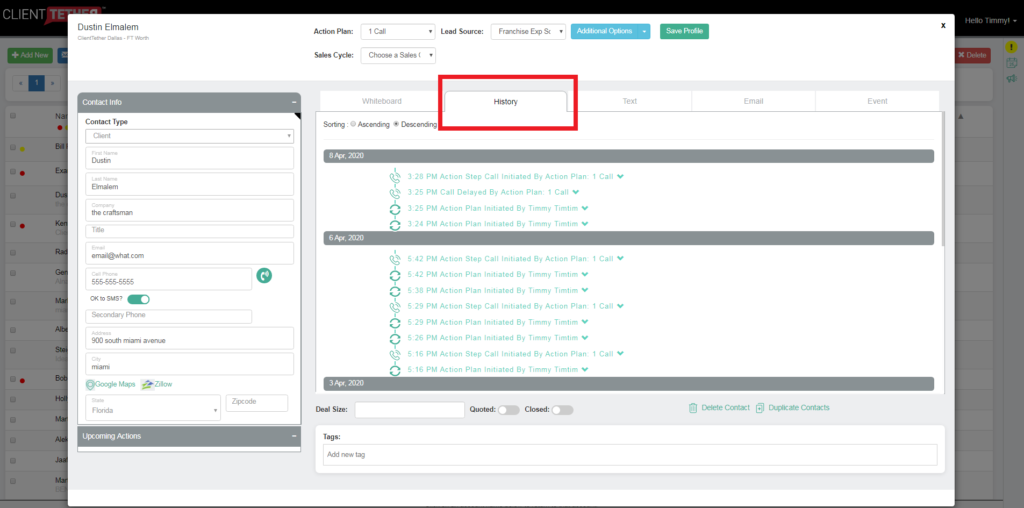
History notes can be accessed by opening the contact profile and clicking on the history tab.
What is stored in History Notes
- Phone calls – This includes a note of when the call took place, how it was placed, who placed it, and an audio recording of the call
- SMS Messages (Text Messages) – This includes a note of when the message was sent, how it was sent, who sent it, and a copy of the text message.
- If SMS excluded client this will be documented in the history note.
- Emails Sent To Your Contacts- This includes how many times emails have been opened by the contact, when the message was sent, who sent it, who the message was CCed and BCCed to, and the actual message.
- Emails Received From Your Contacts – When it was received, who it was sent to, and the actual message. Only Available for users connected to Outlook via our OAuth2.
- Appointments- Provides who scheduled the appointment, When the appointment took place and any notes about the appointment.
- Changes to SMS Permission, Action Plan, Lead Source, and Sales Cycle.
- Notifications about contacts Unsubscribing to Emails
- Notes- Anything you have added through the note section in the whiteboard.
- Proposals being opened
- Proposals being signed.
- Contacts being moved accounts.
How to Add to History Notes
Any action, email, sms, appointments, etc, will automatically populate in the history field. To add a note just go to the whiteboard tab and select add note. Type in you note, Save it, and it will be added to your History Notes.
Unsubscribing From Emails
April 14, 2020Video Overview
What is unsubscribing for emails
Unsubscribing from emails happens when a contact has said they would no longer like to receive email communications from you.
Why we have unsubscribing for emails
The unsubscribe option is provided in every email sent form ClientTether in compliance with the CANSPAM ACT of 2003.
How contacts unsubscribe to emails
- They click on the link at the bottom of the email, again this is ALWAYS included in any email sent from ClientTether.
- They confirm they want to unsubscribe
- They are unsubscribed
How to tell if someone has unsubscribed
A red note in the contacts history will state they have unsubscribed, and their email address will have been removed from their contact profile.
What you can do if someone has unsubscribed from emails
- Reach out to the contact via text or phone call to find out why they unsubscribed.
- Ask if they would like to re-subscribe
- If permission is granted then re-enter the correct email address in their contact profile.
- If permission is not granted then leave the field blank.
A Few important things to note
- A word of warning you should not just go back and re-enter their email without their permission.
- If you have contacts unsubscribing you need to figure out what you need to change, so that they don’t unsubscribe.
Communication Tools
April 14, 2020Overview
ClientTether specializes in helping you create. cultivate, develop and strengthen relationships with all parts of your business: clients, employees, vendors, etc.
In order to accomplish this, we have a compilation of specialized communication tools. Below is a list of these tools and you may click on any of them to get more specific information on how you can maximize the effectiveness of these tools.
Topics
Overview
ClientTether Email is another tool we have to help you maintain timely and essential communication with your contacts. Our email system allows you to send and receive replies in real time. It also Keeps all of the emails stored and accessible through the contact’s history.
In the topics included on this page we are going to discuss everything you need to know about how to use this tool to effectively communicate with your contacts.
Topics
- Email Settings
- Incoming Emails
- Replying to Emails
- Sending Emails
- Unsubscribing From Emails
Sending Emails
- Open
Incoming Calls to VM
April 13, 20204/13/2020
Incoming Calls can now go to a system voicemail.
To avoid the system voicemail, make sure you or your system VM answers the call before our systems sends the caller to VM.
Getting to the Settings for this Feature is as easy as 1,2,3.
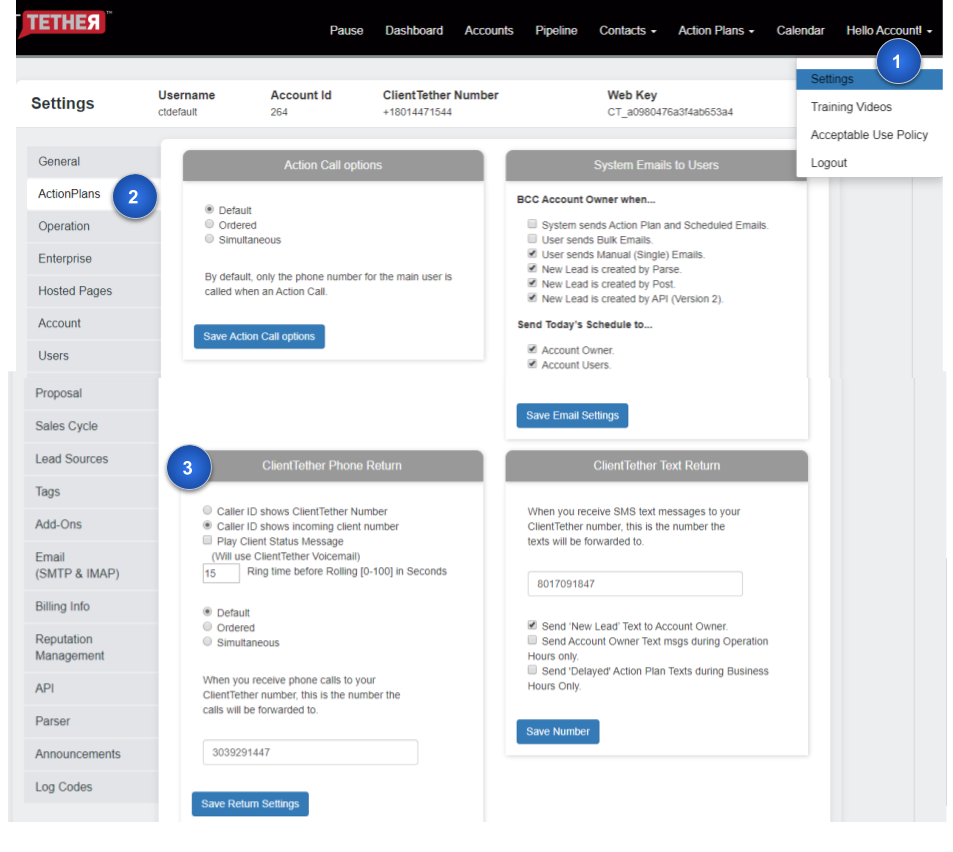
Once you have found the Phone Return Settings as shown above, the simple Default Options work for most Account Owners.
For Default Options
Caller ID can either show the System phone number or the Caller’s Phone Number
Play Client Status Message if left unchecked will connect the incoming call the moment you pick it up. However, if you want to know more about the caller, the system will tell you everything it knows about the caller according to your operation settings.
Ring Time Before Rolling is a setting in Seconds that the system will use before rolling to the next option. The last options is always VM.
Manually Creating Contacts
March 5, 2020Video Demonstration
If you can see the video above click here
Written Instructions
The steps to manually creating a contact are:
- Log into ClientTether
- Click on the Contact Tab from the Navigation Links at the top of the page
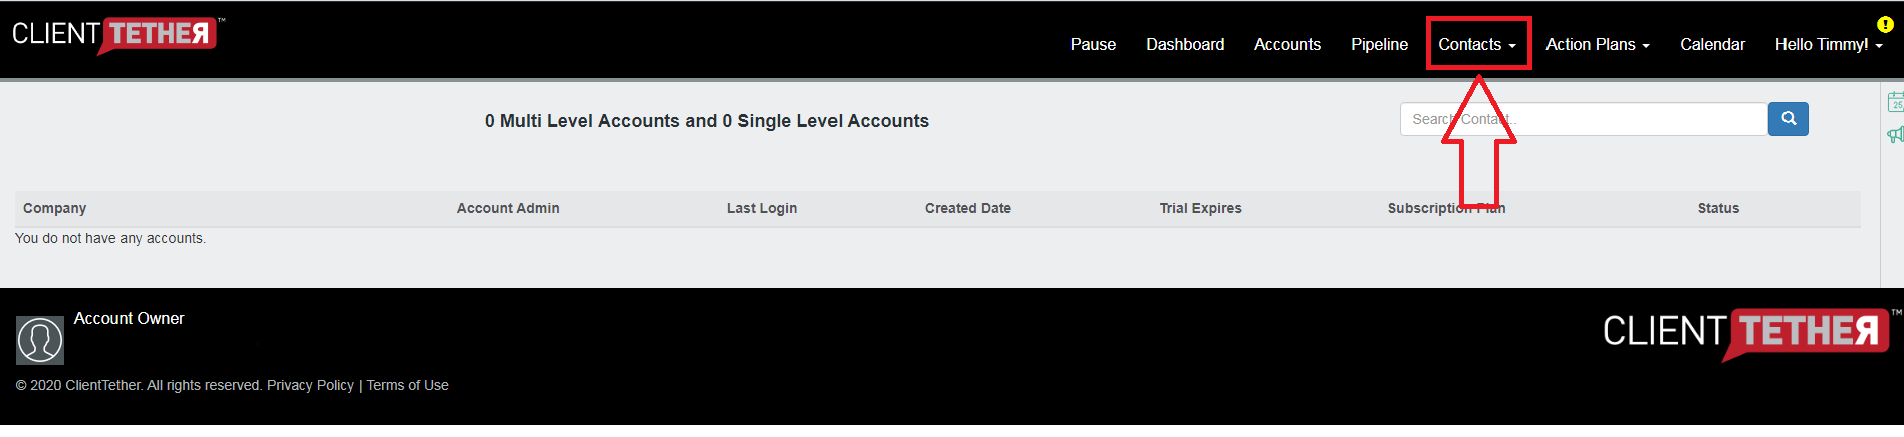
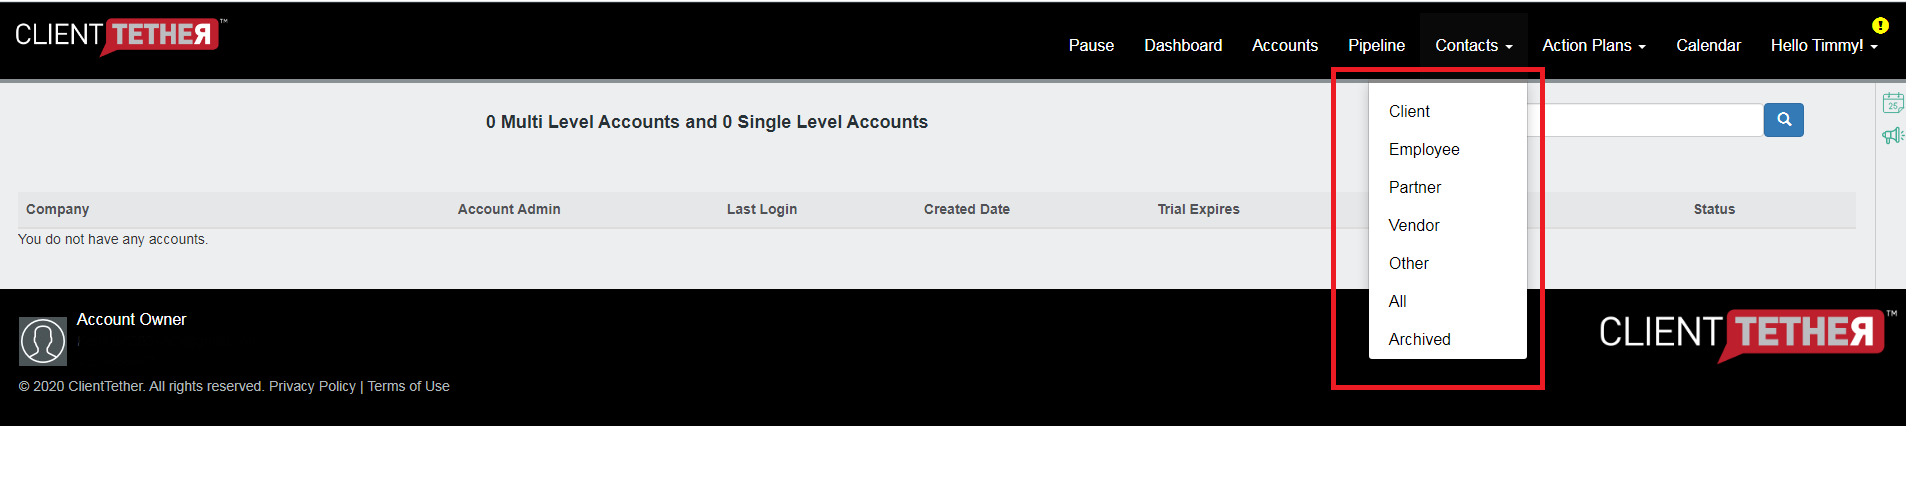
- A drop down Menu will display. Select what category you wish to add a contact to, or just select “All”
- No matter your selection the next step will be the same. In the upper Left hand corner there is an icon called “+ Add New” Click on that Icon
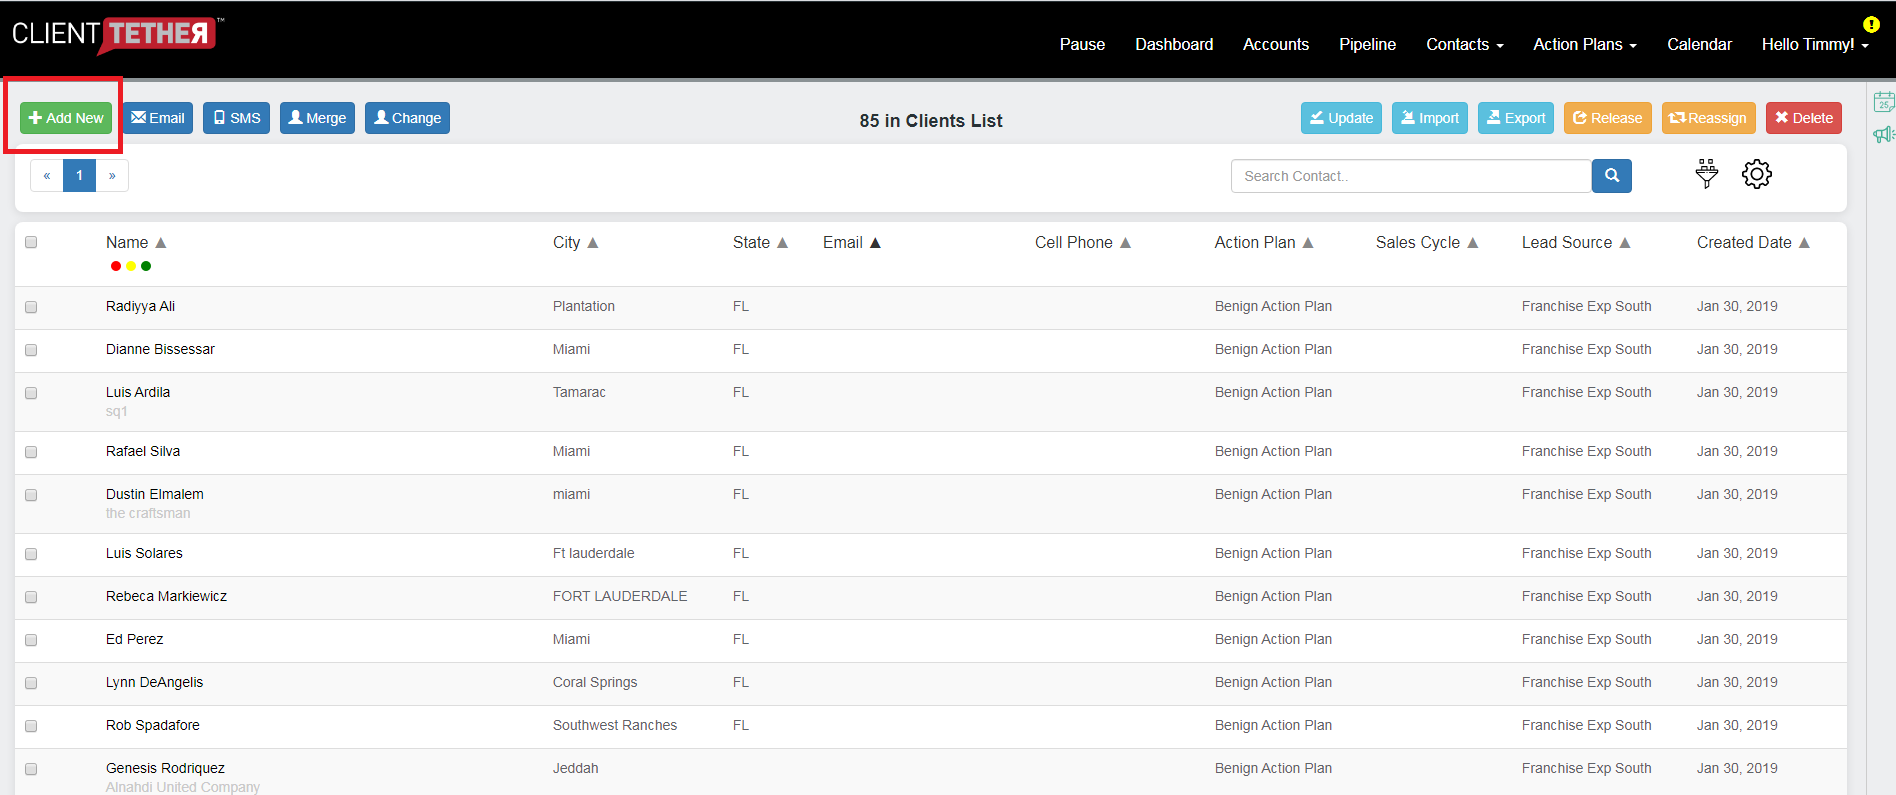
- Fill in the information for the new contact: Type of Contact, Name, Phone, Email, Address, etc.
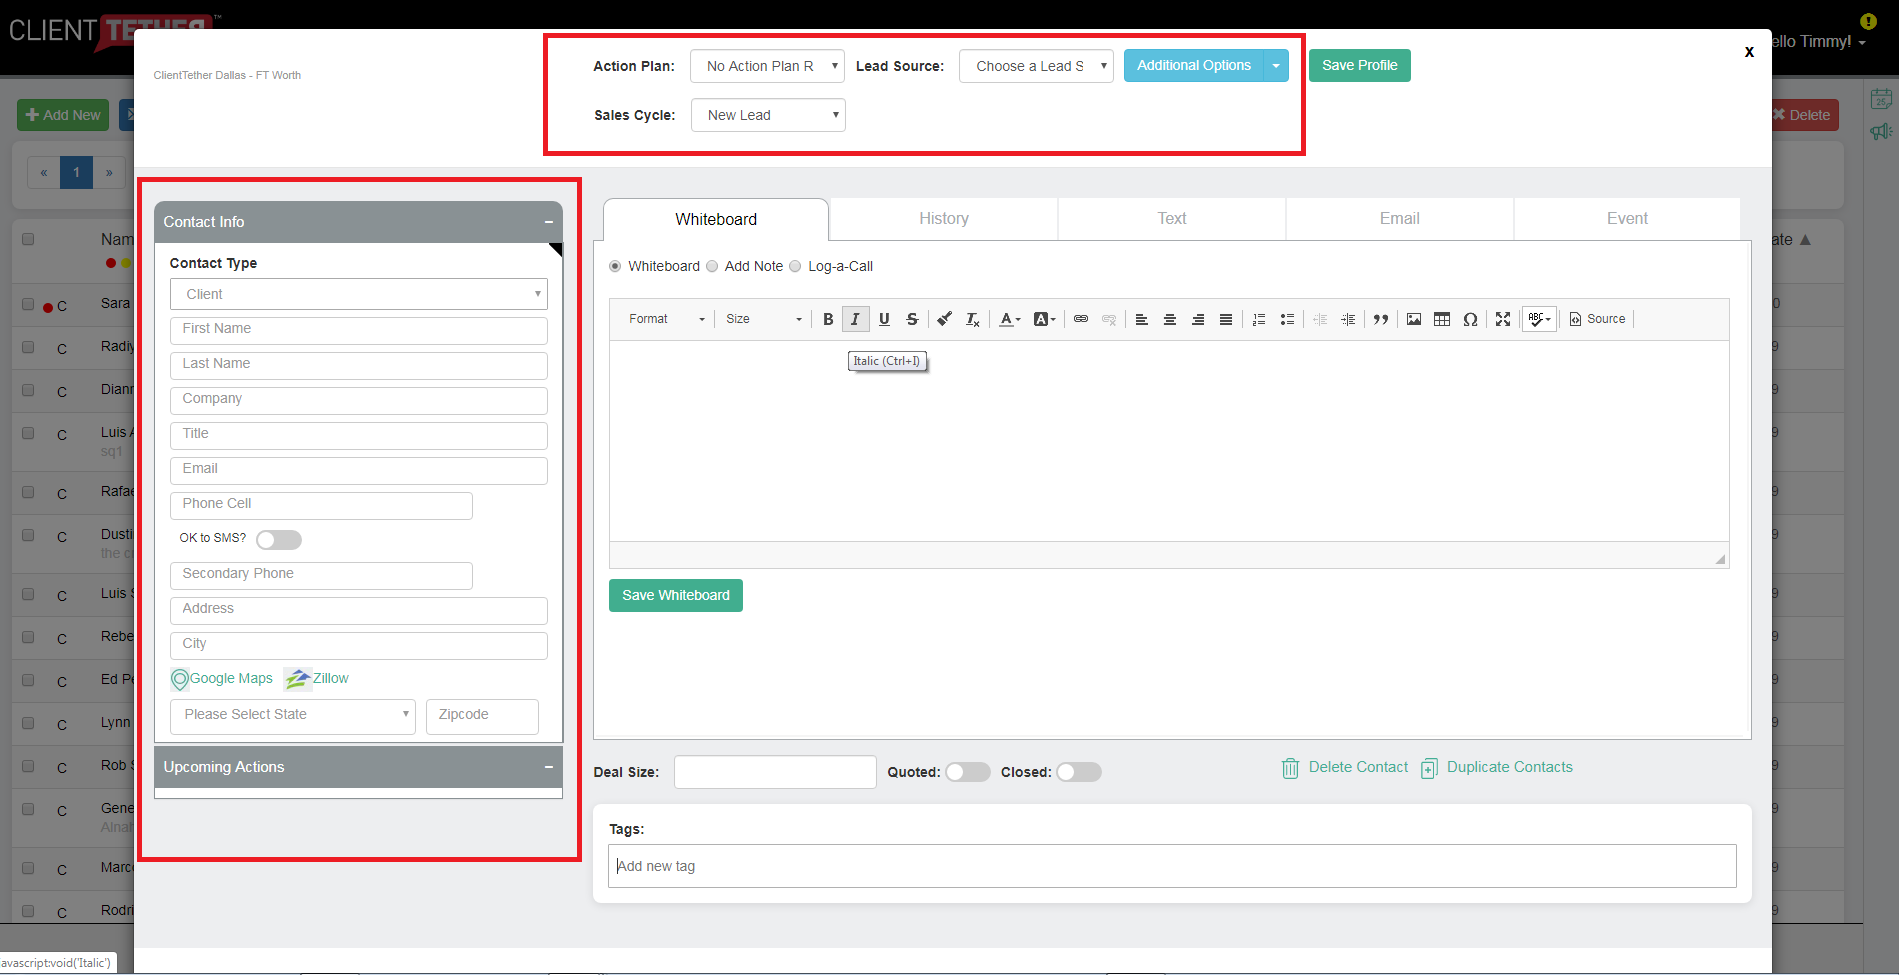
- Click Save and exit the form
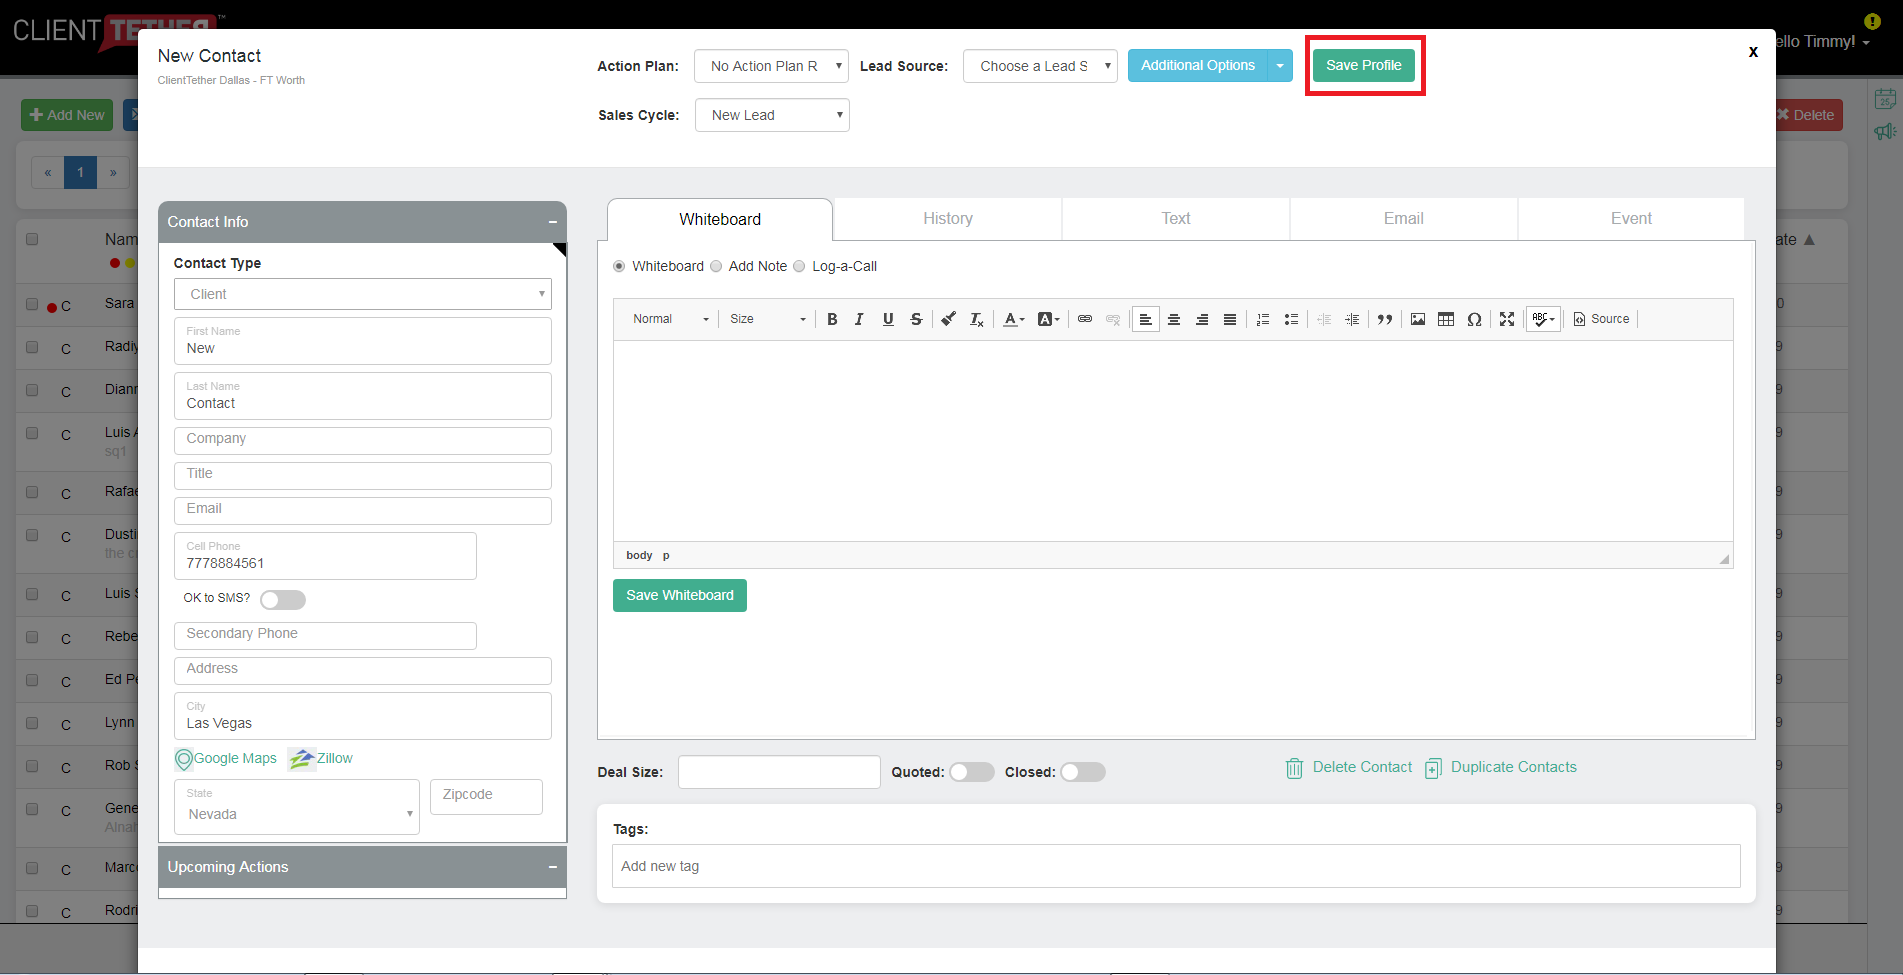
- View new contact
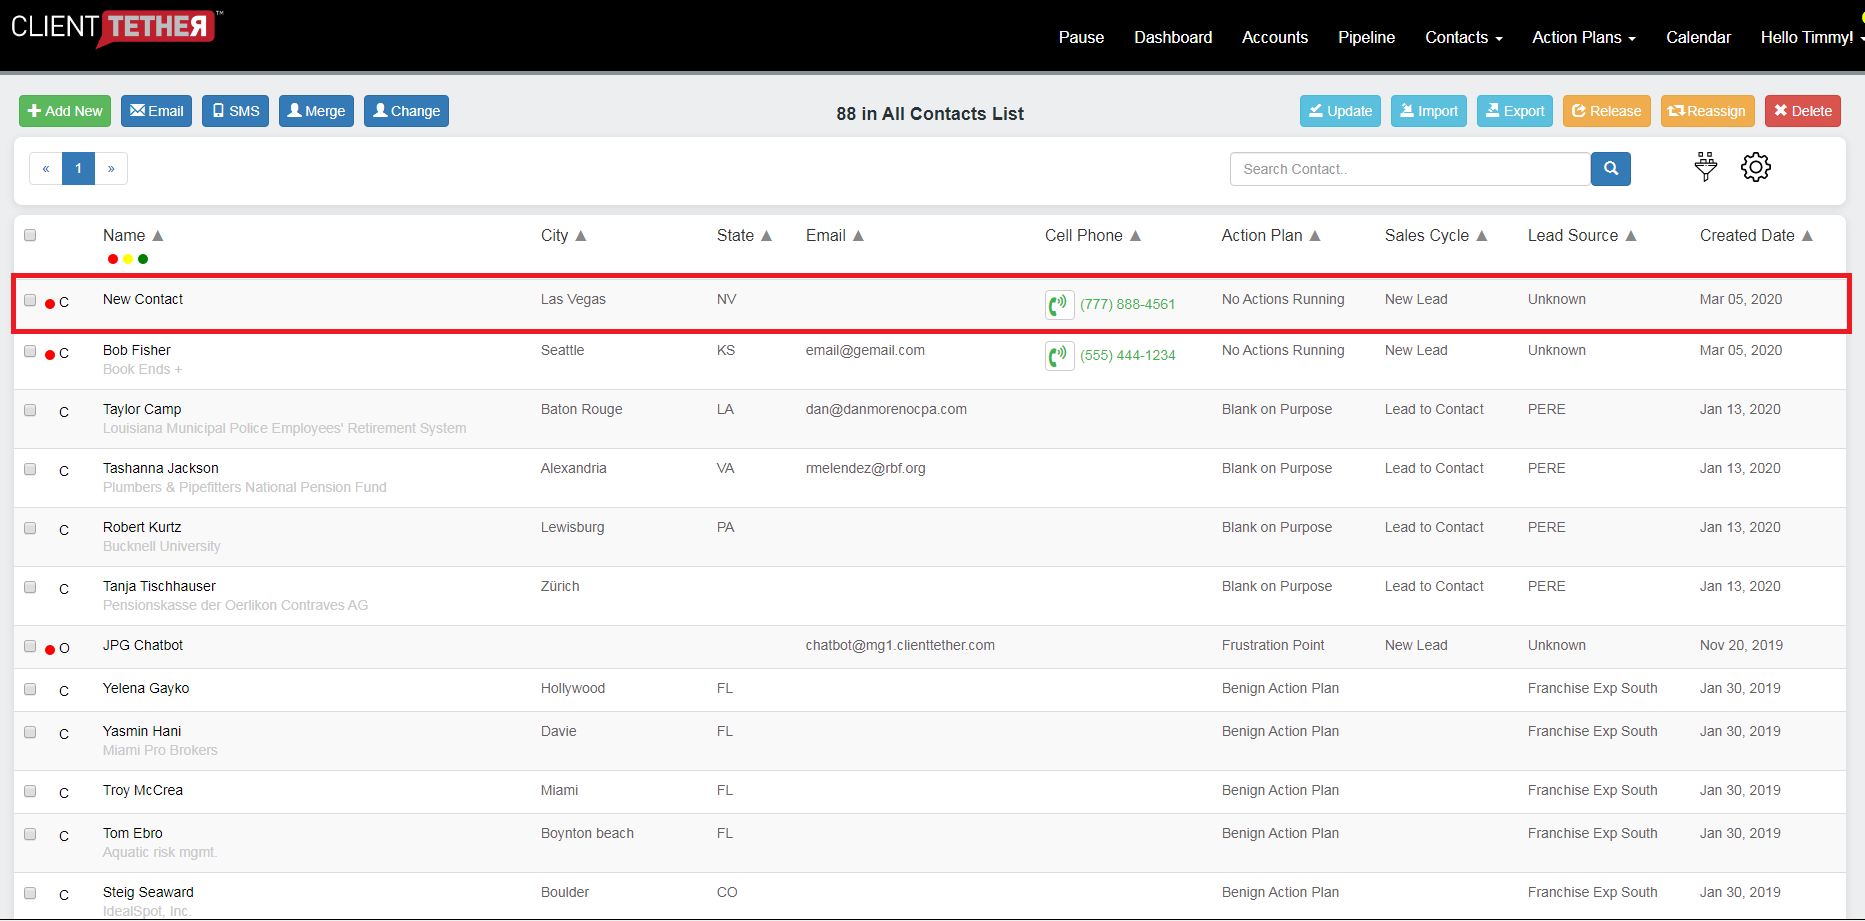
Invite Others to an Appointment
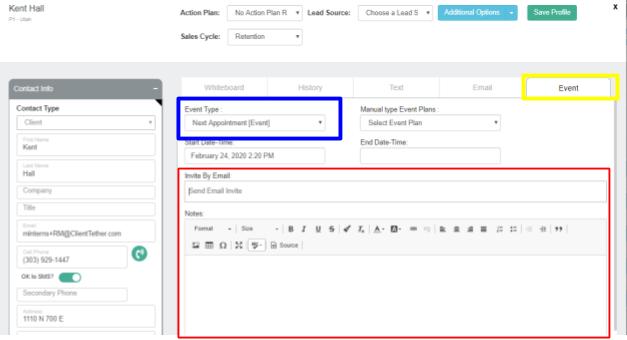
February 24, 2020The long anticipated feature, the ability to invite others to an appointment created in ClientTether. We have released a Minimal Viable Solution available on all Contact Profiles.
Go to the Event tab (Yellow Outline) and then select “Next Appointment” as the Event Type. Now the body of the tab will change to reflect the Appointment options which include a new field to “Invite by Email” field. Here you can enter one or more emails as a comma separated list. Future enhancements will provide easy ways to get Contact email addresses and User email address to auto-populate by suggestive typing.
RN Multi-Level Search
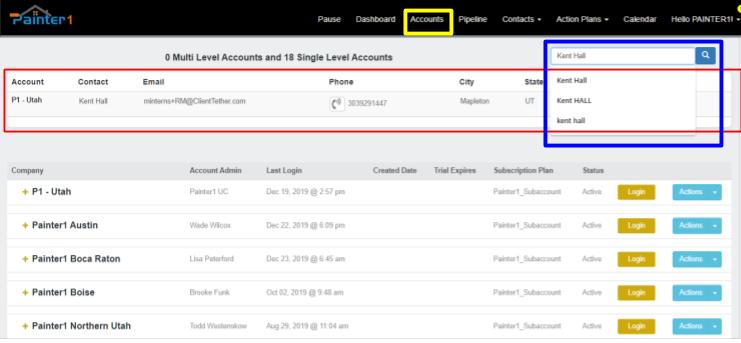
February 24, 2020This feature only applies to ClientTether accounts that have sub accounts (see Yellow outline in the images below).
Now there is a search box in the top right corner of the accounts list (see Blue outline in the image below). This search features looks for Contacts that belong to any of the sub accounts.
Results will appear in an expanded areas (shown in Red outline). The more results the larger this area will be.
Please be aware that searching for more specific data is important to reduce the size of the returned data.